Fragment Transition trong Android
Một Transition là gì?
Activity transition và Fragment transition trong Lollipop được xây dựng trên các đặc điểm mới trong Android được gọi là Transition. Được giới thiệu trong KitKat, Transition Framework cung cấp một API tiện lợi để chuyển đổi giữa các trạng thái UI khác nhau trong một ứng dụng. Framework được xây dựng dựa xoay quanh hai khái niệm: Scenes và Transitions. Một Scene định nghĩa một trạng thái đã cho của UI trong một ứng dụng, trong khi một Transition định nghĩa các thay đổi giữa hai Scene.
Khi một Scene thay đổi, một Transition có hai nhiệm vụ chính: −
- Nắm bắt trạng thái của mỗi view trong cả hai Start scene và End Scene.
- Tạo một Animator dựa trên các sự khác nhau sẽ animate các view từ một scene sang scene khác.
Ví dụ
Ví dụ này giải thích cho bạn cách tạo Custom Animation với Fragment Transition. Bạn theo các bước tương tự như trong ví dụ Hello World. −
| Bước | Miêu tả |
|---|---|
| 1 | Bạn sử dụng Android Studio để tạo một ứng dụng Android có tên là fragmentcustomanimations dưới một package com.example.fragmentcustomanimations |
| 2 | Sửa đổi activity_main.xml, được đặt trong atres/layout/activity_main.xml để thêm một Text View |
| 3 | Tạo một layout là fragment_stack.xml.xml dưới thư mục res/layout để định nghĩa thẻ fragment và thẻ button |
| 4 | Tạo một thư mục được đặt tại res/ và đặt tên nó là animation và thêm fragment_slide_left_enter.xml, fragment_slide_left_exit.xml, ,fragment_slide_right_exit.xml và fragment_slide_left_enter.xml |
| 7 | Trong MainActivity.java, bạn cần thêm fragment stack, fragment manager, và onCreateView() |
| 8 | Chạy ứng dụng để chạy Android Emulator và kiểm tra kết quả các thay đổi đã thực hiện trong ứng dụng |
Sau đây là nội dung của res.layout/activity_main.xml. Nó chứa TextView.
<?xml version="1.0" encoding="utf-8"?>
<TextView xmlns:android="http://schemas.android.com/apk/res/android"
   android:id="@+id/text"
   android:layout_width="match_parent"
   android:layout_height="match_parent"
   android:gravity="center_vertical|center_horizontal"
   android:text="@string/hello_world"
   android:textAppearance="?android:attr/textAppearanceMedium" />
Và đây là nội dung của res/animation/fragment_stack.xml file. Nó chứa frame layout và button.
<?xml version="1.0" encoding="utf-8"?>
<LinearLayout
   xmlns:android="http://schemas.android.com/apk/res/android"
   android:layout_width="match_parent"
   android:layout_height="match_parent"
   android:orientation="vertical" >

   <fragment
      android:id="@+id/fragment1"
      android:name="com.pavan.listfragmentdemo.MyListFragment"
      android:layout_width="match_parent"
      android:layout_height="match_parent" />

</LinearLayout>
Nội dung của res/animation/fragment_slide_left_enter.xml file như sau. Nó chứa phương thức set và đối tượng Animator.
<?xml version="1.0" encoding="utf-8"?>
<set xmlns:android="http://schemas.android.com/apk/res/android">
   <objectAnimator
      android:interpolator="@android:interpolator/decelerate_quint"
      android:valueFrom="100dp" android:valueTo="0dp"
      android:valueType="floatType"
      android:propertyName="translationX"
      android:duration="@android:integer/config_mediumAnimTime" />

   <objectAnimator
      android:interpolator="@android:interpolator/decelerate_quint"
      android:valueFrom="0.0" android:valueTo="1.0"
      android:valueType="floatType"
      android:propertyName="alpha"
      android:duration="@android:integer/config_mediumAnimTime" />
</set>
Dưới đây là nội dung của res/animation/fragment_slide_left_exit.xml file. Nó chứa các thẻ set và objectAnimator.
<?xml version="1.0" encoding="utf-8"?>
<set xmlns:android="http://schemas.android.com/apk/res/android">
   <objectAnimator
      android:interpolator="@android:interpolator/decelerate_quint"
      android:valueFrom="0dp" android:valueTo="-100dp"
      android:valueType="floatType"
      android:propertyName="translationX"
      android:duration="@android:integer/config_mediumAnimTime" />

   <objectAnimator
      android:interpolator="@android:interpolator/decelerate_quint"
      android:valueFrom="1.0" android:valueTo="0.0"
      android:valueType="floatType"
      android:propertyName="alpha"
      android:duration="@android:integer/config_mediumAnimTime" />
</set>
Code sau sẽ là nội dung của res/animation/fragment_slide_right_enter.xml file. Nó chứa các thẻ set và objectAnimator.
<?xml version="1.0" encoding="utf-8"?>
<set xmlns:android="http://schemas.android.com/apk/res/android">
    <objectAnimator
        android:interpolator="@android:interpolator/decelerate_quint"
        android:valueFrom="-100dp" android:valueTo="0dp"
        android:valueType="floatType"
        android:propertyName="translationX"
        android:duration="@android:integer/config_mediumAnimTime" />

   <objectAnimator
        android:interpolator="@android:interpolator/decelerate_quint"
        android:valueFrom="0.0" android:valueTo="1.0"
        android:valueType="floatType"
        android:propertyName="alpha"
        android:duration="@android:integer/config_mediumAnimTime" />
</set>
Code sau sẽ là nội dung của es/animation/fragment_slide_right_exit.xml file. Nó chứa các thẻ set và objectAnimator.
<?xml version="1.0" encoding="utf-8"?>
<set xmlns:android="http://schemas.android.com/apk/res/android">
    <objectAnimator
        android:interpolator="@android:interpolator/decelerate_quint"
        android:valueFrom="0dp" android:valueTo="100dp"
        android:valueType="floatType"
        android:propertyName="translationX"
        android:duration="@android:integer/config_mediumAnimTime" />

    <objectAnimator
        android:interpolator="@android:interpolator/decelerate_quint"
        android:valueFrom="1.0" android:valueTo="0.0"
        android:valueType="floatType"
        android:propertyName="alpha"
        android:duration="@android:integer/config_mediumAnimTime" />
</set>
Nội dung của src/main/java/MainActivity.java file như sau. Nó chứa button listener, stack fragment và onCreateView.
package com.example.fragmentcustomanimations;

import android.app.Activity;
import android.app.Fragment;
import android.app.FragmentTransaction;
import android.os.Bundle;

import android.view.LayoutInflater;
import android.view.View;
import android.view.View.OnClickListener;
import android.view.ViewGroup;

import android.widget.Button;
import android.widget.TextView;

/**
 * Demonstrates the use of custom animations in a FragmentTransaction when
 * pushing and popping a stack.
 */
public class FragmentCustomAnimations extends Activity {
   int mStackLevel = 1;

   @Override
   protected void onCreate(Bundle savedInstanceState) {
      super.onCreate(savedInstanceState);
      setContentView(R.layout.fragment_stack);

      // Watch for button clicks.
      Button button = (Button)findViewById(R.id.new_fragment);

      button.setOnClickListener(new OnClickListener() {
         public void onClick(View v) {
            addFragmentToStack();
         }
      });

      if (savedInstanceState == null) {
         // Do first time initialization -- add initial fragment.
         Fragment newFragment = CountingFragment.newInstance(mStackLevel);
         FragmentTransaction ft = getFragmentManager().beginTransaction();
         ft.add(R.id.simple_fragment, newFragment).commit();
      }
      else
      {
         mStackLevel = savedInstanceState.getInt("level");
      }
   }

   @Override
   public void onSaveInstanceState(Bundle outState) {
      super.onSaveInstanceState(outState);
      outState.putInt("level", mStackLevel);
   }

   void addFragmentToStack() {
      mStackLevel++;

      // Instantiate a new fragment.
      Fragment newFragment = CountingFragment.newInstance(mStackLevel);

      // Add the fragment to the activity, pushing this transaction
      // on to the back stack.
      FragmentTransaction ft = getFragmentManager().beginTransaction();
      ft.setCustomAnimations(R.animator.fragment_slide_left_enter,
      R.animator.fragment_slide_left_exit,
      R.animator.fragment_slide_right_enter,
      R.animator.fragment_slide_right_exit);
      ft.replace(R.id.simple_fragment, newFragment);
      ft.addToBackStack(null);
      ft.commit();
   }

   public static class CountingFragment extends Fragment {
      int mNum;
      /**
      * Create a new instance of CountingFragment, providing "num"
      * as an argument.
      */
      static CountingFragment newInstance(int num) {
         CountingFragment f = new CountingFragment();

         // Supply num input as an argument.
         Bundle args = new Bundle();
         args.putInt("num", num);
         f.setArguments(args);
         return f;
      }

      /**
      * When creating, retrieve this instance's number from its arguments.
      */
      @Override
      public void onCreate(Bundle savedInstanceState) {
         super.onCreate(savedInstanceState);
         mNum = getArguments() != null ? getArguments().getInt("num") : 1;
      }
      /**
      * The Fragment's UI is just a simple text view showing its
      * instance number.
      */
      @Override
      public View onCreateView(LayoutInflater inflater, ViewGroup container,Bundle savedInstanceState) {
         View v = inflater.inflate(R.layout.hello_world, container, false);
         View tv = v.findViewById(R.id.text);
         ((TextView)tv).setText("Fragment #" + mNum);
         tv.setBackgroundDrawable(getResources().getDrawable(android.R.drawable.gallery_thumb));
         return v;
      }
   }
}
AndroidManifest.xml có nội dung như sau:
<?xml version="1.0" encoding="utf-8"?>
   <manifest xmlns:android="http://schemas.android.com/apk/res/android"
   package="com.example.fragmentcustomanimations"
   android:versionCode="1"
   android:versionName="1.0" >

   <application
      android:allowBackup="true"
      android:icon="@drawable/ic_launcher"
      android:label="@string/app_name"
      android:theme="@style/AppTheme" >

      <activity
         android:name="com.example.fragmentcustomanimations.MainActivity"
         android:label="@string/app_name" >

         <intent-filter>
            <action android:name="android.intent.action.MAIN" />
            <category android:name="android.intent.category.LAUNCHER" />
         </intent-filter>

      </activity>

   </application>
</manifest>
Chạy ứng dụng Android
Bây giờ, chạy ứng dụng Fragment Transitions đã tạo ở trên. Giả sử bạn đã tạo AVD trong khi cài đặt. Để chạy ứng dụng từ Android Studio, mở activity file và nhấn biểu tượng Run từ thanh công cụ.
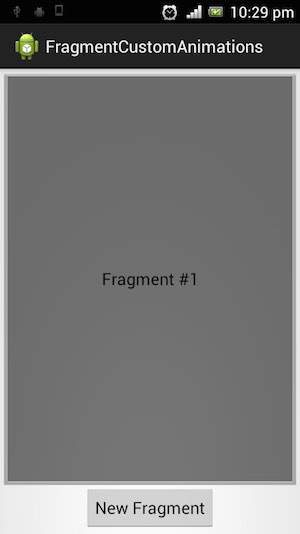
Nếu nhấn vào New Fragement, nó sẽ chuyển đổi từ fragment đầu tiên sang fragment thứ hai như sau:

Đã có app VietJack trên điện thoại, giải bài tập SGK, SBT Soạn văn, Văn mẫu, Thi online, Bài giảng....miễn phí. Tải ngay ứng dụng trên Android và iOS.


Các bạn có thể mua thêm khóa học JAVA CORE ONLINE VÀ ỨNG DỤNG cực hay, giúp các bạn vượt qua các dự án trên trường và đi thực tập Java. Khóa học có giá chỉ 300K, nhằm ưu đãi, tạo điều kiện cho sinh viên cho thể mua khóa học.
Nội dung khóa học gồm 16 chuơng và 100 video cực hay, học trực tiếp tại https://www.udemy.com/tu-tin-di-lam-voi-kien-thuc-ve-java-core-toan-tap/ Bạn nào có nhu cầu mua, inbox trực tiếp a Tuyền, cựu sinh viên Bách Khoa K53, fb: https://www.facebook.com/tuyen.vietjack
Follow facebook cá nhân Nguyễn Thanh Tuyền https://www.facebook.com/tuyen.vietjack để tiếp tục theo dõi các loạt bài mới nhất về Java,C,C++,Javascript,HTML,Python,Database,Mobile.... mới nhất của chúng tôi.
Bài học Angular phổ biến tại vietjack.com: