Send SMS trong Android
Trong Android, bạn có thể sử dụng SmsManager API hoặc các thiết bị xây dựng sẵn ứng dụng SMS để gửi SMS. Trong chương này, chúng tôi minh họa hai ví dụ cơ bản để gửi thông điệp SMS. −
SmsManager API trong Android
SmsManager smsManager = SmsManager.getDefault();
smsManager.sendTextMessage("phoneNo", null, "sms message", null, null);
Ứng dụng SMS đã xây dựng sẵn
Intent sendIntent = new Intent(Intent.ACTION_VIEW);
sendIntent.putExtra("sms_body", "default content");
sendIntent.setType("vnd.android-dir/mms-sms");
startActivity(sendIntent);
Tất nhiên, cả hai cần SEND_SMS permission.
<uses-permission android:name="android.permission.SEND_SMS" />
Ngoài phương thức trên, có một số phương thức quan trọng khác có sẵn trong lớp SmsManager. Bảng dưới liệt kê các phương thức này: −
| Stt. | Phương thức & Miêu tả |
|---|---|
| 1 | ArrayList<String> divideMessage(String text)
Phương thức này phân chia một thông điệp text thành một số phần nhỏ, không lớn hơn kích cỡ thông điệp SMS tối đa |
| 2 |
static SmsManager getDefault()
Phương thức này được sử dụng để lấy instance mặc định của SmsManager |
| 3 |
void sendDataMessage(String destinationAddress, String scAddress, short destinationPort, byte[] data, PendingIntent sentIntent, PendingIntent deliveryIntent)
Phương thức này được sử dụng để gửi một dữ liệu dựa trên SMS tới một cổng (port) ứng dụng cụ thể |
| 4 |
void sendMultipartTextMessage(String destinationAddress, String scAddress, ArrayList<String> parts, ArrayList<PendingIntent> sentIntents, ArrayList<PendingIntent> deliveryIntents)
Gửi một text có nhiều phần dựa trên SMS |
| 5 |
void sendTextMessage(String destinationAddress, String scAddress, String text, PendingIntent sentIntent, PendingIntent deliveryIntent)
Gửi một text dựa tên SMS |
Ví dụ
Ví dụ sau minh họa cách sử dụng đối tượng SmsManager để gửi một SMS tới số điện thoại đã cho.
Để thực nghiệm ví dụ này, bạn cần thiết bị Mobile thực sự được trang bị với phiên bản Android OS mới nhất, nếu không bạn sẽ gặp vấn đề với màn hình mô phỏng Emulator.
Sau đây là nội dung của Main Activity file đã được sửa đổi: src/com.example.tutorialspoint/MainActivity.java.
package com.example.tutorialspoint;

import android.os.Bundle;
import android.app.Activity;
import android.telephony.SmsManager;
import android.util.Log;
import android.view.Menu;
import android.view.View;
import android.widget.Button;
import android.widget.EditText;
import android.widget.Toast;

public class MainActivity extends Activity {
   Button sendBtn;
   EditText txtphoneNo;
   EditText txtMessage;

   @Override
   protected void onCreate(Bundle savedInstanceState) {
      super.onCreate(savedInstanceState);
      setContentView(R.layout.activity_main);

      sendBtn = (Button) findViewById(R.id.btnSendSMS);
      txtphoneNo = (EditText) findViewById(R.id.editText);
      txtMessage = (EditText) findViewById(R.id.editText2);

      sendBtn.setOnClickListener(new View.OnClickListener() {
         public void onClick(View view) {
            sendSMSMessage();
         }
      });
   }
   protected void sendSMSMessage() {
      Log.i("Send SMS", "");
      String phoneNo = txtphoneNo.getText().toString();
      String message = txtMessage.getText().toString();

      try {
         SmsManager smsManager = SmsManager.getDefault();
         smsManager.sendTextMessage(phoneNo, null, message, null, null);
         Toast.makeText(getApplicationContext(), "SMS sent.", Toast.LENGTH_LONG).show();
      }

      catch (Exception e) {
         Toast.makeText(getApplicationContext(), "SMS faild, please try again.", Toast.LENGTH_LONG).show();
         e.printStackTrace();
      }
   }

   @Override
   public boolean onCreateOptionsMenu(Menu menu) {
      // Inflate the menu; this adds items to the action bar if it is present.
      getMenuInflater().inflate(R.menu.main, menu);
      return true;
   }
}
Sau đây là nội dung của res/layout/activity_main.xml file:
<RelativeLayout xmlns:android="http://schemas.android.com/apk/res/android"
   xmlns:tools="http://schemas.android.com/tools"
   android:layout_width="match_parent"
   android:layout_height="match_parent"
   android:paddingBottom="@dimen/activity_vertical_margin"
   android:paddingLeft="@dimen/activity_horizontal_margin"
   android:paddingRight="@dimen/activity_horizontal_margin"
   android:paddingTop="@dimen/activity_vertical_margin"
   tools:context="MainActivity">

   <TextView
      android:id="@+id/textView1"
      android:layout_width="wrap_content"
      android:layout_height="wrap_content"
      android:text="Sending SMS Example"
      android:layout_alignParentTop="true"
      android:layout_centerHorizontal="true"
      android:textSize="30dp" />

   <TextView
      android:id="@+id/textView2"
      android:layout_width="wrap_content"
      android:layout_height="wrap_content"
      android:text="Tutorials point "
      android:textColor="#ff87ff09"
      android:textSize="30dp"
      android:layout_below="@+id/textView1"
      android:layout_alignRight="@+id/imageButton"
      android:layout_alignEnd="@+id/imageButton" />

   <ImageButton
      android:layout_width="wrap_content"
      android:layout_height="wrap_content"
      android:id="@+id/imageButton"
      android:src="@drawable/abc"
      android:layout_below="@+id/textView2"
      android:layout_centerHorizontal="true" />

   <EditText
      android:layout_width="wrap_content"
      android:layout_height="wrap_content"
      android:id="@+id/editText"
      android:hint="Enter Phone Number"
      android:phoneNumber="true"
      android:textColorHint="@color/abc_primary_text_material_dark"
      android:layout_below="@+id/imageButton"
      android:layout_centerHorizontal="true" />

   <EditText
      android:layout_width="wrap_content"
      android:layout_height="wrap_content"
      android:id="@+id/editText2"
      android:layout_below="@+id/editText"
      android:layout_alignLeft="@+id/editText"
      android:layout_alignStart="@+id/editText"
      android:textColorHint="@color/abc_primary_text_material_dark"
      android:layout_alignRight="@+id/imageButton"
      android:layout_alignEnd="@+id/imageButton"
      android:hint="Enter SMS" />

   <Button
      android:layout_width="wrap_content"
      android:layout_height="wrap_content"
      android:text="Send Sms"
      android:id="@+id/btnSendSMS"
      android:layout_below="@+id/editText2"
      android:layout_centerHorizontal="true"
      android:layout_marginTop="48dp" />

</RelativeLayout>
Sau đây là nội dung của res/values/strings.xml để định nghĩa hai hằng −
<?xml version="1.0" encoding="utf-8"?>
<resources>
   <string name="app_name">tutorialspoint</string>
   <string name="action_settings">Settings</string>
</resources>
Sau đây là nội dung mặc định của AndroidManifest.xml:
<?xml version="1.0" encoding="utf-8"?>
<manifest xmlns:android="http://schemas.android.com/apk/res/android"
   package="com.example.tutorialspoint"
   android:versionCode="1"
   android:versionName="1.0" >

   <uses-sdk
      android:minSdkVersion="8"
      android:targetSdkVersion="22" />
   <uses-permission android:name="android.permission.SEND_SMS" />

   <application
      android:allowBackup="true"
      android:icon="@drawable/ic_launcher"
      android:label="@string/app_name"
      android:theme="@style/AppTheme" >

      <activity
         android:name="com.example.tutorialspoint.MainActivity"
         android:label="@string/app_name" >

         <intent-filter>
            <action android:name="android.intent.action.MAIN" />
            <category android:name="android.intent.category.LAUNCHER" />
         </intent-filter>

      </activity>

   </application>
</manifest>
Cuối cùng, bạn chạy ứng dụng Android vừa tạo ở trên.

Bây giờ, bạn có thể một nhập số điện thoại và một thông điệp text sẽ được gửi tới số đó. Cuối cùng, nhấn nút Send SMS để gửi. Đảm bảo kết nối GSM/CDMA đang làm việc tốt.
Bạn có thể lấy một số SMS được phân biệt bởi dấu phảy và sau đó bên trong chương trình của mình, bạn phải parse chúng thành một mảng chuỗi và cuối cùng bạn có thể sử dụng vòng lặp để gửi thông điệp tới tất cả số đã cho. Đó là cách bạn biết SMS Client riêng cho mình. Phần tiếp minh họa cho bạn cách sử dụng SMS Client đang tồn tại để gửi SMS.
Sử dụng Intent đã xây dựng sẵn để gửi SMS
Bạn có thể sử dụng Android Intent để gửi SMS bằng việc gọi tính năng SMS đã xây dựng sẵn của Android. Khu vực dưới giải thích các phần khác nhau trong đối tượng Intent mà cần thiết để gửi một SMS.
Đối tượng Intent: Action để gửi SMS
Bạn sẽ sử dụng ATION_VIEW để chạy một SMS Client đã được cài đặt trên thiết bị Android của bạn. Sau đây là cú pháp cơ bản để tạo một Intent với ACTION_VIEW.
Intent smsIntent = new Intent(Intent.ACTION_VIEW);
Đối tượng Intent: Dữ liệu/Kiểu để gửi SMS
Để gửi một SMS, bạn cần xác định smsto: dạng URI sử dụng phương thức setData() và kiểu dữ liệu sẽ là vnd.android-dir/mms-sms sử dụng phương thức setType(), như sau: −
smsIntent.setData(Uri.parse("smsto:"));
smsIntent.setType("vnd.android-dir/mms-sms");
Đối tượng Intent: Extra để gửi SMS
Android hỗ trợ sẵn để thêm số điện thoại và thông điệp text để gửi một SMS, như sau: −
smsIntent.putExtra("address"  , new String("0123456789;3393993300"));
smsIntent.putExtra("sms_body"  , "Test SMS to Angilla");
Ở đây, address và sms_body là phân biệt kiểu chữ và nên được xác định chỉ trong dạng các ký tự nhỏ. Bạn có thể xác định nhiều hơn một số trong chuỗi đơn nhưng được phân biệt nhau bởi dấu chấm phảy.
Ví dụ
Ví dụ sau minh họa cho bạn cách sử dụng đối tượng Intent để chạy SMS Client để gửi một SMS tới các người nhận đã cho.
Sau đây là nội dung của Main Activity file đã được sửa đổi: src/com.example.tutorialspoint/MainActivity.java.
package com.example.tutorialspoint;

import android.net.Uri;
import android.os.Bundle;
import android.app.Activity;
import android.content.Intent;
import android.util.Log;
import android.view.Menu;
import android.view.View;
import android.widget.Button;
import android.widget.Toast;

public class MainActivity extends Activity {
   @Override
   protected void onCreate(Bundle savedInstanceState) {
      super.onCreate(savedInstanceState);
      setContentView(R.layout.activity_main);

      Button startBtn = (Button) findViewById(R.id.button);
      startBtn.setOnClickListener(new View.OnClickListener() {
         public void onClick(View view) {
            sendSMS();
         }
      });
   }

   protected void sendSMS() {
      Log.i("Send SMS", "");
      Intent smsIntent = new Intent(Intent.ACTION_VIEW);

      smsIntent.setData(Uri.parse("smsto:"));
      smsIntent.setType("vnd.android-dir/mms-sms");
      smsIntent.putExtra("address"  , new String ("01234"));
      smsIntent.putExtra("sms_body"  , "Test ");

      try {
         startActivity(smsIntent);
         finish();
         Log.i("Finished sending SMS...", "");
      }
      catch (android.content.ActivityNotFoundException ex) {
         Toast.makeText(MainActivity.this,
         "SMS faild, please try again later.", Toast.LENGTH_SHORT).show();
      }
   }

   @Override
   public boolean onCreateOptionsMenu(Menu menu) {
      // Inflate the menu; this adds items to the action bar if it is present.
      getMenuInflater().inflate(R.menu.main, menu);
      return true;
   }
}
Sau đây là nội dung của res/layout/activity_main.xml file −
<RelativeLayout xmlns:android="http://schemas.android.com/apk/res/android"
   xmlns:tools="http://schemas.android.com/tools"
   android:layout_width="match_parent"
   android:layout_height="match_parent"
   android:paddingLeft="@dimen/activity_horizontal_margin"
   android:paddingRight="@dimen/activity_horizontal_margin"
   android:paddingTop="@dimen/activity_vertical_margin"
   android:paddingBottom="@dimen/activity_vertical_margin"
   tools:context=".MainActivity">

   <TextView
      android:layout_width="wrap_content"
      android:layout_height="wrap_content"
      android:text="Drag and Drop Example"
      android:id="@+id/textView"
      android:layout_alignParentTop="true"
      android:layout_centerHorizontal="true"
      android:textSize="30dp" />

   <TextView
      android:layout_width="wrap_content"
      android:layout_height="wrap_content"
      android:text="Tutorials Point "
      android:id="@+id/textView2"
      android:layout_below="@+id/textView"
      android:layout_centerHorizontal="true"
      android:textSize="30dp"
      android:textColor="#ff14be3c" />

   <ImageView
      android:layout_width="wrap_content"
      android:layout_height="wrap_content"
      android:id="@+id/imageView"
      android:src="@drawable/abc"
      android:layout_marginTop="48dp"
      android:layout_below="@+id/textView2"
      android:layout_centerHorizontal="true" />

   <Button
      android:layout_width="wrap_content"
      android:layout_height="wrap_content"
      android:text="Compose SMS"
      android:id="@+id/button"
      android:layout_below="@+id/imageView"
      android:layout_alignRight="@+id/textView2"
      android:layout_alignEnd="@+id/textView2"
      android:layout_marginTop="54dp"
      android:layout_alignLeft="@+id/imageView"
      android:layout_alignStart="@+id/imageView" />

</RelativeLayout>
Sau đây là nội dung của res/values/strings.xml để định nghĩa hai hằng −
<?xml version="1.0" encoding="utf-8"?>
<resources>
   <string name="app_name">tutorialspoint</string>
   <string name="action_settings">Settings</string>
</resources>
Sau đây là nội dung mặc định của AndroidManifest.xml −
<?xml version="1.0" encoding="utf-8"?>
<manifest xmlns:android="http://schemas.android.com/apk/res/android"
   package="com.example.tutorialspoint"
   android:versionCode="1"
   android:versionName="1.0" >

   <uses-sdk
      android:minSdkVersion="8"
      android:targetSdkVersion="22" />

   <application
      android:allowBackup="true"
      android:icon="@drawable/ic_launcher"
      android:label="@string/app_name"
      android:theme="@style/AppTheme" >

      <activity
         android:name="com.example.tutorialspoint.MainActivity"
         android:label="@string/app_name" >

         <intent-filter>
            <action android:name="android.intent.action.MAIN" />
            <category android:name="android.intent.category.LAUNCHER" />
         </intent-filter>

      </activity>

   </application>
</manifest>
Cuối cùng, bạn chạy ứng dụng Android vừa tạo ở trên.
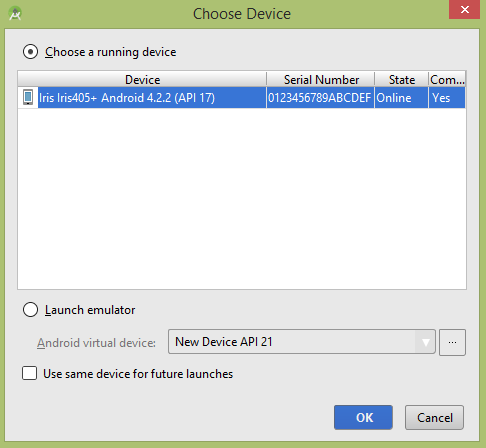
Chọn thiết bị mobile và sau đó kiểm tra thiết bị mobile của bạn sẽ hiển thị màn hình sau:
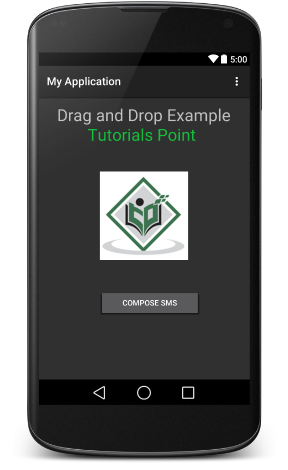
Bây giờ sử dụng nút Compose SMS để chạy SMS Client đã xây dựng sẵn trong Android, sẽ hiển thị như sau:
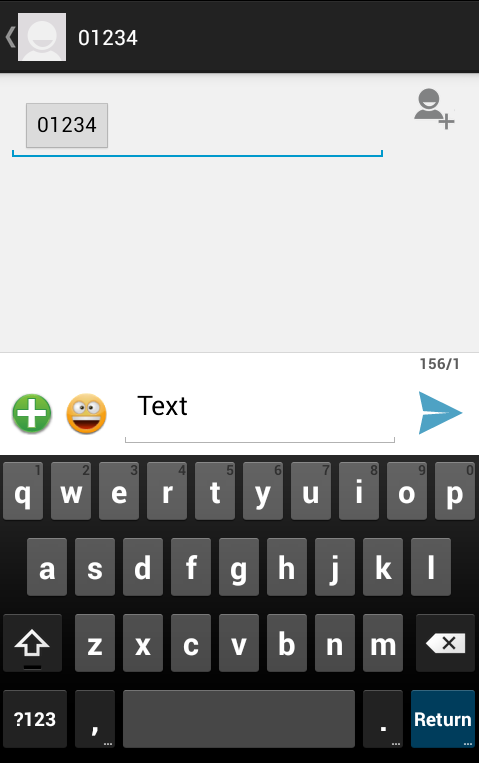
Bạn có thể sửa đổi các trường mặc định đã cho và sau đó sử dụng nút Send SMS để gửi SMS của bạn tới người nhận.
Đã có app VietJack trên điện thoại, giải bài tập SGK, SBT Soạn văn, Văn mẫu, Thi online, Bài giảng....miễn phí. Tải ngay ứng dụng trên Android và iOS.


Các bạn có thể mua thêm khóa học JAVA CORE ONLINE VÀ ỨNG DỤNG cực hay, giúp các bạn vượt qua các dự án trên trường và đi thực tập Java. Khóa học có giá chỉ 300K, nhằm ưu đãi, tạo điều kiện cho sinh viên cho thể mua khóa học.
Nội dung khóa học gồm 16 chuơng và 100 video cực hay, học trực tiếp tại https://www.udemy.com/tu-tin-di-lam-voi-kien-thuc-ve-java-core-toan-tap/ Bạn nào có nhu cầu mua, inbox trực tiếp a Tuyền, cựu sinh viên Bách Khoa K53, fb: https://www.facebook.com/tuyen.vietjack
Follow facebook cá nhân Nguyễn Thanh Tuyền https://www.facebook.com/tuyen.vietjack để tiếp tục theo dõi các loạt bài mới nhất về Java,C,C++,Javascript,HTML,Python,Database,Mobile.... mới nhất của chúng tôi.
Bài học Angular phổ biến tại vietjack.com: