
Grid View trong Android
GridView trong Android hiển thị các item trong mảng lưới hai chiều có thể scroll và các item này không cần thiết phải được định nghĩa trước, nhưng chúng tự động chèn vào Layout bởi sử dụng một ListAdapter
Grid view
Một Adapter thực sự là cầu nối giữa các thành phần UI và nguồn dữ liệu mà điền dữ liệu vào trong thành phần UI. Adapter giữ dữ liệu và gửi dữ liệu tới Adapter View, từ đó view có thể lấy dữ liệu từ Adapter View đó và hiển thị dữ liệu trên các view khác nhau ở dạng Spinner, List View, Grid View, …
The ListView and GridView are subclasses of AdapterView and they can be populated by binding them to an Adapter, which retrieves data from an external source and creates a View that represents each data entry.
Các thuộc tính của GridView trong Android
Bảng dưới liệt kê một số thuộc tính riêng cho GridView: −
| Attribute | Miêu tả |
|---|---|
| android:id | Đây là ID mà nhận diện duy nhất Layout |
| android:columnWidth | Xác định độ rộng cố định cho mỗi cột. Có thể là px, dp, sp, in, hoặc mm |
| android:gravity | Xác định gravity bên trong mỗi ô. Giá trị có thể là top, bottom, left, right, center, center_vertical, center_horizontal ... |
| android:horizontalSpacing | Xác định khoảng cách mặc định theo chiều ngang giữa các cột. Có thể là px, dp, sp, in, hoặc mm |
| android:numColumns | Xác định có bao nhiêu cột để hiển thị. Có thể là một giá trị nguyên, như "100" hoặc auto_fit nghĩa là hiển thị bao nhiêu cột để có thể điền vào không gian có sẵn |
| android:stretchMode | Xác định cách các cột nên dãn ra để điền vào không gian còn trống. Nó phải là một trong các giá trị: −
|
| android:verticalSpacing | Định nghĩa khoảng cách mặc định theo chiều dọc giữa các hàng. Có thể là trong px, dp, sp, in, hoặc mm |
Ví dụ
Ví dụ sau sẽ đưa bạn qua các bước đơn giản để minh họa cách bạn tạo ứng dụng Android bởi sử dụng GridView. Sau đây là các bước để sửa đổi ứng dụng Android đã tạo trong chương Ví dụ Hello World. −
| Bước | Miêu tả |
|---|---|
| 1 | Bạn sử dụng Android studio IDE để tạo ứng dụng Android với tên HelloWorld dưới một package là com.example.helloworld như đã giải thích trong chương Ví dụ Hello World . |
| 2 | Sửa đổi nội dung mặc định của res/layout/activity_main.xmlfile để bao nội dung GridView với các thuộc tính |
| 3 | Không cần thay đổi string.xml, Android Studio sẽ để ý các hằng mặc định này |
| 4 | Đặt một số hình ảnh trong res/drawable-hdpi .Tôi đã đặt sample0.jpg, sample1.jpg, sample2.jpg, sample3.jpg, sample4.jpg, sample5.jpg, sample6.jpg và sample7.jpg |
| 5 | Tạo một lớp mới có tên ImageAdapter dưới một package là com.example.helloworld mà kế thừa BaseAdapter. Lớp này sẽ triển khai các tính năng của một Adapter |
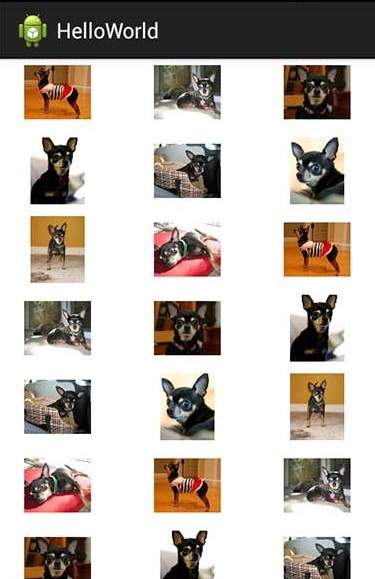
| 6 | Chạy ứng dụng để chạy Android Emulator và kiểm tra kết quả các thay đổi đã được thực hiện trong ứng dụng |
Sau đây là nội dung của Main Activity file đã được sửa đổi: src/com.example.helloworld/MainActivity.java.
package com.example.helloworld;

import android.os.Bundle;
import android.app.Activity;
import android.view.Menu;
import android.widget.GridView;

public class MainActivity extends Activity {
   @Override
   protected void onCreate(Bundle savedInstanceState) {
      super.onCreate(savedInstanceState);
      setContentView(R.layout.activity_main);

      GridView gridview = (GridView) findViewById(R.id.gridview);
      gridview.setAdapter(new ImageAdapter(this));
   }

   @Override
   public boolean onCreateOptionsMenu(Menu menu) {
      getMenuInflater().inflate(R.menu.main, menu);
      return true;
   }
}
Sau đây là nội dung của res/layout/activity_main.xml file −
<?xml version="1.0" encoding="utf-8"?>
<GridView xmlns:android="http://schemas.android.com/apk/res/android"
   android:id="@+id/gridview"
   android:layout_width="fill_parent"
   android:layout_height="fill_parent"
   android:columnWidth="90dp"
   android:numColumns="auto_fit"
   android:verticalSpacing="10dp"
   android:horizontalSpacing="10dp"
   android:stretchMode="columnWidth"
   android:gravity="center"
/>
Sau đây là nội dung của res/values/strings.xml để định nghĩa hai hằng −
<?xml version="1.0" encoding="utf-8"?>
<resources>
   <string name="app_name">HelloWorld</string>
   <string name="action_settings">Settings</string>
</resources>
Sau đây là nội dung của src/com.example.helloworld/ImageAdapter.java file −
package com.example.helloworld;

import android.content.Context;
import android.view.View;
import android.view.ViewGroup;
import android.widget.BaseAdapter;
import android.widget.GridView;
import android.widget.ImageView;

public class ImageAdapter extends BaseAdapter {
   private Context mContext;

   // Constructor
   public ImageAdapter(Context c) {
      mContext = c;
   }

   public int getCount() {
      return mThumbIds.length;
   }

   public Object getItem(int position) {
      return null;
   }

   public long getItemId(int position) {
      return 0;
   }

   // create a new ImageView for each item referenced by the Adapter
   public View getView(int position, View convertView, ViewGroup parent) {
      ImageView imageView;

      if (convertView == null) {
         imageView = new ImageView(mContext);
         imageView.setLayoutParams(new GridView.LayoutParams(85, 85));
         imageView.setScaleType(ImageView.ScaleType.CENTER_CROP);
         imageView.setPadding(8, 8, 8, 8);
      }
      else
      {
         imageView = (ImageView) convertView;
      }
      imageView.setImageResource(mThumbIds[position]);
      return imageView;
   }

   // Keep all Images in array
   public Integer[] mThumbIds = {
      R.drawable.sample_2, R.drawable.sample_3,
      R.drawable.sample_4, R.drawable.sample_5,
      R.drawable.sample_6, R.drawable.sample_7,
      R.drawable.sample_0, R.drawable.sample_1,
      R.drawable.sample_2, R.drawable.sample_3,
      R.drawable.sample_4, R.drawable.sample_5,
      R.drawable.sample_6, R.drawable.sample_7,
      R.drawable.sample_0, R.drawable.sample_1,
      R.drawable.sample_2, R.drawable.sample_3,
      R.drawable.sample_4, R.drawable.sample_5,
      R.drawable.sample_6, R.drawable.sample_7
   };
}
Chạy ứng dụng Hello World! vừa sửa đổi ở trên. Giả sử bạn đã tạo AVD trong khi cài đặt. Để chạy ứng dụng từ Android Studio, mở activity file và nhấn biểu tượng Run từ thanh công cụ. −

Ví dụ về SubActivity trong Android
Từ ví dụ trên, chúng ta kế thừa các tính năng và sẽ hiển thị grid image đã lựa chọn trong toàn màn hình. Để làm được điều này, chúng ta cần giới thiệu một Activity mới. Ghi nhớ các bước chúng ta cần thực hiện cho một Activity, như chúng ta phải triển khai một lớp Activity, định nghĩa nó trong AndroidManifest.xml file, định nghĩa Layout liên quan và cuối cùng kết nối sub-activity đó với main activity. Sau đây là các bước để sửa đổi ví dụ trên:−
| Bước | Miêu tả |
|---|---|
| 1 | Bạn sử dụng Android Studio IDE để tạo một ứng dụng Android với tên là HelloWorld dưới một package là com.example.helloworld như đã giải thích trong chương Ví dụ Hello World . |
| 2 | Tạo một lớp Activity mới có tên SingleViewActivity.java dưới một package là com.example.helloworld |
| 3 | Tạo một layout file cho Activity mới này dưới thư mục res/layout//. Đặt tên nó là single_view.xml. |
| 4 | Định nghĩa Activity mới trongAndroidManifest.xml bởi sử dụng thẻ <activity.../> . Một ứng dụng có thể có một hoặc nhiều Activity mà không có bất cứ giới hạn nào |
| 5 | Chạy ứng dụng để chạy Android Emulator và kiểm tra kết quả các thay đổi đã thực hiện trong ứng dụng |
Sau đây là nội dung của Main Activity file đã được sửa đổi: src/com.example.helloworld/MainActivity.java. .
package com.example.helloworld;

import android.app.Activity;
import android.content.Intent;
import android.os.Bundle;
import android.view.Menu;
import android.view.View;
import android.widget.AdapterView;
import android.widget.AdapterView.OnItemClickListener;
import android.widget.GridView;

public class MainActivity extends Activity {
   @Override
   protected void onCreate(Bundle savedInstanceState) {
      super.onCreate(savedInstanceState);
      setContentView(R.layout.activity_main);

      GridView gridview = (GridView) findViewById(R.id.gridview);
      gridview.setAdapter(new ImageAdapter(this));

      gridview.setOnItemClickListener(new OnItemClickListener() {
         public void onItemClick(AdapterView<?> parent, View v, int position, long id){
            // Send intent to SingleViewActivity
            Intent i = new Intent(getApplicationContext(), SingleViewActivity.class);

            // Pass image index
            i.putExtra("id", position);
            startActivity(i);
         }
      });
   }

   @Override
   public boolean onCreateOptionsMenu(Menu menu) {
      getMenuInflater().inflate(R.menu.main, menu);
      return true;
   }
}
Sau đây là nội dung của new activity file src/com.example.helloworld/SingleViewActivity.java file −
package com.example.helloworld;

import android.app.Activity;
import android.content.Intent;
import android.os.Bundle;
import android.widget.ImageView;

public class SingleViewActivity extends Activity {
   @Override
   public void onCreate(Bundle savedInstanceState) {
      super.onCreate(savedInstanceState);
      setContentView(R.layout.single_view);

      // Get intent data
      Intent i = getIntent();

      // Selected image id
      int position = i.getExtras().getInt("id");
      ImageAdapter imageAdapter = new ImageAdapter(this);

      ImageView imageView = (ImageView) findViewById(R.id.SingleView);
      imageView.setImageResource(imageAdapter.mThumbIds[position]);
   }
}
Sau đây là nội dung của res/layout/single_view.xml file −
<?xml version="1.0" encoding="utf-8"?>
<LinearLayout xmlns:android="http://schemas.android.com/apk/res/android"
   android:layout_width="match_parent"
   android:layout_height="match_parent"
   android:orientation="vertical" >

<ImageView android:id="@+id/SingleView"
   android:layout_width="fill_parent"
   android:layout_height="fill_parent"/>

</LinearLayout>
Sau đây là nội dung của AndroidManifest.xml để định nghĩa hai hằng −
<?xml version="1.0" encoding="utf-8"?>
<manifest xmlns:android="http://schemas.android.com/apk/res/android"
   package="com.example.helloworld"
   android:versionCode="1"
   android:versionName="1.0" >

   <uses-sdk
      android:minSdkVersion="8"
      android:targetSdkVersion="22" />

   <application
      android:allowBackup="true"
      android:icon="@drawable/ic_launcher"
      android:label="@string/app_name"
      android:theme="@style/AppTheme" >

      <activity
         android:name="com.example.helloworld.MainActivity"
         android:label="@string/app_name" >

         <intent-filter>
            <action android:name="android.intent.action.MAIN" />
            <category android:name="android.intent.category.LAUNCHER" />
         </intent-filter>

      </activity>

      <activity android:name=".SingleViewActivity"></activity>

   </application>
</manifest>
Chạy ứng dụng Hello World! vừa sửa đổi ở trên. Giả sử bạn đã tạo AVD trong khi cài đặt. Để chạy ứng dụng từ Android Studio, mở activity file và nhấn biểu tượng Run từ thanh công cụ. −
Bây giờ nếu bạn click chuột vào một trong các hình ảnh trên, thì nó sẽ chỉ hiển thị một hình ảnh đó. Ví dụ:

Đã có app VietJack trên điện thoại, giải bài tập SGK, SBT Soạn văn, Văn mẫu, Thi online, Bài giảng....miễn phí. Tải ngay ứng dụng trên Android và iOS.


Các bạn có thể mua thêm khóa học JAVA CORE ONLINE VÀ ỨNG DỤNG cực hay, giúp các bạn vượt qua các dự án trên trường và đi thực tập Java. Khóa học có giá chỉ 300K, nhằm ưu đãi, tạo điều kiện cho sinh viên cho thể mua khóa học.
Nội dung khóa học gồm 16 chuơng và 100 video cực hay, học trực tiếp tại https://www.udemy.com/tu-tin-di-lam-voi-kien-thuc-ve-java-core-toan-tap/ Bạn nào có nhu cầu mua, inbox trực tiếp a Tuyền, cựu sinh viên Bách Khoa K53, fb: https://www.facebook.com/tuyen.vietjack
Follow facebook cá nhân Nguyễn Thanh Tuyền https://www.facebook.com/tuyen.vietjack để tiếp tục theo dõi các loạt bài mới nhất về Java,C,C++,Javascript,HTML,Python,Database,Mobile.... mới nhất của chúng tôi.
Bài học Angular phổ biến tại vietjack.com:


 Giải bài tập SGK & SBT
 Tài liệu giáo viên
 Sách
Sách
 Khóa học
 Thi online
 Hỏi đáp