Audio Capture trong Android
Android có một Microphone được xây dựng sẵn, thông qua đó bạn có thể nắm bắt âm thanh, lưu giữ nó hoặc play nó trên điện thoại. Có nhiều cách để thực hiện điều này nhưng cách phổ biến nhất là thông qua lớp MediaRecorder.
Android cung cấp lớp MediaRecorder để ghi âm audio và video. Để sử dụng lớp MediaRecorder này, đầu tiên bạn tạo một instance của lớp MediaRecorder. Cú pháp như sau:
MediaRecorder myAudioRecorder = new MediaRecorder();
Bây giờ bạn sẽ thiết lập source, định dạng output, định dạng encoding và output file. Cú pháp của chúng là:
myAudioRecorder.setAudioSource(MediaRecorder.AudioSource.MIC);
myAudioRecorder.setOutputFormat(MediaRecorder.OutputFormat.THREE_GPP);
myAudioRecorder.setAudioEncoder(MediaRecorder.OutputFormat.AMR_NB);
myAudioRecorder.setOutputFile(outputFile);
Sau khi xác định chúng, chúng ta có thể gọi hai phương thức cơ bản để chuẩn bị và bắt đầu ghi âm audio:
myAudioRecorder.prepare();
myAudioRecorder.start();
Ngoài các phương thức này, lớp MediaRecorder còn có một số phương thức khác cung cấp cho bạn nhiều sự điều khiển hơn tới việc thu âm audio và video.
| Stt | Phương thức & Miêu tả |
|---|---|
| 1 | setAudioSource()
Phương thức này xác định source của audio để được thu âm |
| 2 | setVideoSource()
Phương thức này xác định source của video để được thu âm |
| 3 | setOutputFormat()
Phương thức này xác định định dạng audio để được lưu giữ |
| 4 |
setAudioEncoder()
Phương thức này xác định bộ mã hóa audio để được sử dụng |
| 5 |
setOutputFile()
Phương thức này cấu hình path tới file trong đó audio được lưu giữ |
| 6 | stop()
Phương thức này dừng tiến trình thu âm |
| 7 | release()
Phương thức này nên được gọi khi cần đến recoder |
Ví dụ
Ứng dụng Android dưới đây sử dụng lớp MediaRecorder để tạo ứng dụng Audio Capture và sử dụng lớp MediaPlayer để play audio.
Sau đây là nội dung của src/MainActivity.java
package com.example.sairamkrishna.myapplication;

import android.app.Activity;
import android.media.MediaPlayer;
import android.media.MediaRecorder;

import android.os.Bundle;
import android.os.Environment;

import android.view.Menu;
import android.view.MenuItem;
import android.view.View;
import android.view.animation.Animation;
import android.view.animation.AnimationUtils;
import android.widget.Button;

import android.widget.ImageView;
import android.widget.Toast;
import java.io.IOException;


public class MainActivity extends Activity {
   Button play,stop,record;
   private MediaRecorder myAudioRecorder;
   private String outputFile = null;

   @Override
   protected void onCreate(Bundle savedInstanceState) {
      super.onCreate(savedInstanceState);
      setContentView(R.layout.activity_main);

      play=(Button)findViewById(R.id.button3);
      stop=(Button)findViewById(R.id.button2);
      record=(Button)findViewById(R.id.button);

      stop.setEnabled(false);
      play.setEnabled(false);
      outputFile = Environment.getExternalStorageDirectory().getAbsolutePath() + "/recording.3gp";;

      myAudioRecorder=new MediaRecorder();
      myAudioRecorder.setAudioSource(MediaRecorder.AudioSource.MIC);
      myAudioRecorder.setOutputFormat(MediaRecorder.OutputFormat.THREE_GPP);
      myAudioRecorder.setAudioEncoder(MediaRecorder.OutputFormat.AMR_NB);
      myAudioRecorder.setOutputFile(outputFile);

      record.setOnClickListener(new View.OnClickListener() {
         @Override
         public void onClick(View v) {
            try {
               myAudioRecorder.prepare();
               myAudioRecorder.start();
            }

            catch (IllegalStateException e) {
               // TODO Auto-generated catch block
               e.printStackTrace();
            }

            catch (IOException e) {
               // TODO Auto-generated catch block
               e.printStackTrace();
            }

            record.setEnabled(false);
            stop.setEnabled(true);

            Toast.makeText(getApplicationContext(), "Recording started", Toast.LENGTH_LONG).show();
         }
      });

      stop.setOnClickListener(new View.OnClickListener() {
         @Override
         public void onClick(View v) {
            myAudioRecorder.stop();
            myAudioRecorder.release();
            myAudioRecorder  = null;

            stop.setEnabled(false);
            play.setEnabled(true);

            Toast.makeText(getApplicationContext(), "Audio recorded successfully",Toast.LENGTH_LONG).show();
         }
      });

      play.setOnClickListener(new View.OnClickListener() {
         @Override
         public void onClick(View v) throws IllegalArgumentException,SecurityException,IllegalStateException {
            MediaPlayer m = new MediaPlayer();

            try {
               m.setDataSource(outputFile);
            }

            catch (IOException e) {
               e.printStackTrace();
            }

            try {
               m.prepare();
            }

            catch (IOException e) {
               e.printStackTrace();
            }

            m.start();
            Toast.makeText(getApplicationContext(), "Playing audio", Toast.LENGTH_LONG).show();
         }
      });
   }

   @Override
   public boolean onCreateOptionsMenu(Menu menu) {
      // Inflate the menu; this adds items to the action bar if it is present.
      getMenuInflater().inflate(R.menu.menu_main, menu);
      return true;
   }

   @Override
   public boolean onOptionsItemSelected(MenuItem item) {
      // Handle action bar item clicks here. The action bar will
      // automatically handle clicks on the Home/Up button, so long
      // as you specify a parent activity in AndroidManifest.xml.

      int id = item.getItemId();

      //noinspection SimplifiableIfStatement
      if (id == R.id.action_settings) {
         return true;
      }
      return super.onOptionsItemSelected(item);
   }
}
Sau đây là nội dung của activity_main.xml
<RelativeLayout xmlns:android="http://schemas.android.com/apk/res/android"
   xmlns:tools="http://schemas.android.com/tools"
   android:layout_width="match_parent"
   android:layout_height="match_parent"
   android:paddingLeft="@dimen/activity_horizontal_margin"
   android:paddingRight="@dimen/activity_horizontal_margin"
   android:paddingTop="@dimen/activity_vertical_margin"
   android:paddingBottom="@dimen/activity_vertical_margin"
   tools:context=".MainActivity">

   <TextView
      android:layout_width="wrap_content"
      android:layout_height="wrap_content"
      android:text="Android Audio Recording"
      android:id="@+id/textView"
      android:textSize="30dp"
      android:layout_alignParentTop="true"
      android:layout_alignParentRight="true"
      android:layout_alignParentEnd="true" />

   <TextView
      android:layout_width="wrap_content"
      android:layout_height="wrap_content"
      android:text="Tutorialspoint"
      android:id="@+id/textView2"
      android:textColor="#ff3eff0f"
      android:textSize="35dp"
      android:layout_below="@+id/textView"
      android:layout_centerHorizontal="true" />

   <ImageView
      android:layout_width="wrap_content"
      android:layout_height="wrap_content"
      android:id="@+id/imageView"
      android:src="@drawable/logo"
      android:layout_below="@+id/textView2"
      android:layout_alignLeft="@+id/textView2"
      android:layout_alignStart="@+id/textView2"
      android:layout_alignRight="@+id/textView2"
      android:layout_alignEnd="@+id/textView2" />

   <Button
      android:layout_width="wrap_content"
      android:layout_height="wrap_content"
      android:text="Record"
      android:id="@+id/button"
      android:layout_below="@+id/imageView"
      android:layout_alignParentLeft="true"
      android:layout_alignParentStart="true"
      android:layout_marginTop="59dp" />

   <Button
      android:layout_width="wrap_content"
      android:layout_height="wrap_content"
      android:text="Stop"
      android:id="@+id/button2"
      android:layout_alignTop="@+id/button"
      android:layout_centerHorizontal="true" />

   <Button
      android:layout_width="wrap_content"
      android:layout_height="wrap_content"
      android:text="play"
      android:id="@+id/button3"
      android:layout_alignTop="@+id/button2"
      android:layout_alignRight="@+id/textView"
      android:layout_alignEnd="@+id/textView" />

</RelativeLayout>
Sau đây là nội dung của Strings.xml
<resources>
   <string name="app_name">My Application</string>
   <string name="hello_world">Hello world!</string>
   <string name="action_settings">Settings</string>
</resources>
Sau đây là nội dung của AndroidManifest.xml
<?xml version="1.0" encoding="utf-8"?>
<manifest xmlns:android="http://schemas.android.com/apk/res/android"
   package="com.example.audiocapture"
   android:versionCode="1"
   android:versionName="1.0" >

   <uses-permission android:name="android.permission.WRITE_EXTERNAL_STORAGE"/>
   <uses-permission android:name="android.permission.RECORD_AUDIO" />

   <application
      android:allowBackup="true"
      android:icon="@drawable/ic_launcher"
      android:label="@string/app_name"
      android:theme="@style/AppTheme" >

      <activity
         android:name="com.example.audiocapture.MainActivity"
         android:label="@string/app_name" >

         <intent-filter>
            <action android:name="android.intent.action.MAIN" />
            <category android:name="android.intent.category.LAUNCHER" />
         </intent-filter>

      </activity>

   </application>
</manifest>
Cuối cùng, bạn chạy ứng dụng Android vừa tạo ở trên.
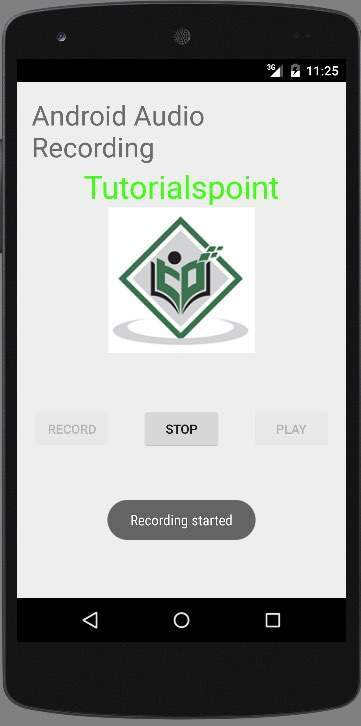
Bây giờ, theo mặc định bạn sẽ thấy các nút STOP và PLAY là disable. Nhấn nút RECORD và ứng dụng bắt đầu thu âm. Nó sẽ hiển thị màn hình sau:

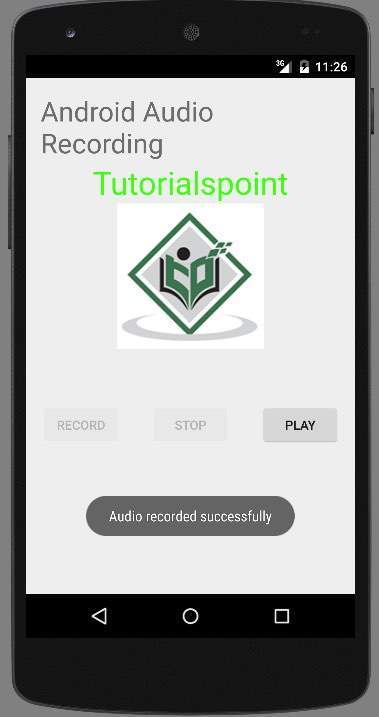
Bây giờ, nhấn nút STOP và nó sẽ lưu phần audio đã được ghi âm vào thẻ sd ngoại vi. Khi bạn nhấn nút STOP, màn hình sẽ hiển thị:

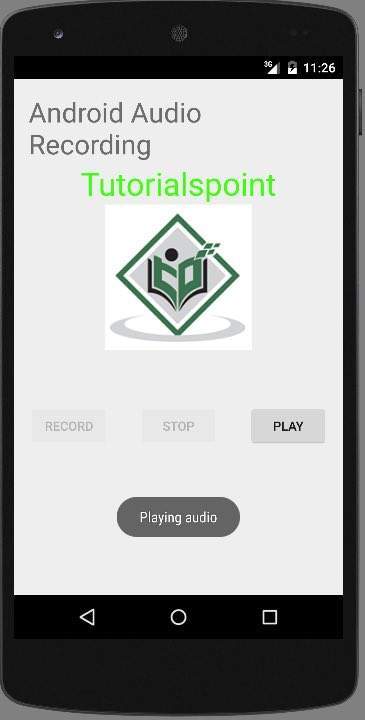
Bây giờ, nhấn nút PLAY và phần audio đã được ghi âm sẽ bắt đầu play trên thiết bị. Thông báo sau xuất hiện khi bạn nhấn nút PLAY.

Đã có app VietJack trên điện thoại, giải bài tập SGK, SBT Soạn văn, Văn mẫu, Thi online, Bài giảng....miễn phí. Tải ngay ứng dụng trên Android và iOS.
Theo dõi chúng tôi miễn phí trên mạng xã hội facebook và youtube:Các bạn có thể mua thêm khóa học JAVA CORE ONLINE VÀ ỨNG DỤNG cực hay, giúp các bạn vượt qua các dự án trên trường và đi thực tập Java. Khóa học có giá chỉ 300K, nhằm ưu đãi, tạo điều kiện cho sinh viên cho thể mua khóa học.
Nội dung khóa học gồm 16 chuơng và 100 video cực hay, học trực tiếp tại https://www.udemy.com/tu-tin-di-lam-voi-kien-thuc-ve-java-core-toan-tap/ Bạn nào có nhu cầu mua, inbox trực tiếp a Tuyền, cựu sinh viên Bách Khoa K53, fb: https://www.facebook.com/tuyen.vietjack
Follow facebook cá nhân Nguyễn Thanh Tuyền https://www.facebook.com/tuyen.vietjack để tiếp tục theo dõi các loạt bài mới nhất về Java,C,C++,Javascript,HTML,Python,Database,Mobile.... mới nhất của chúng tôi.
Bài học Angular phổ biến tại vietjack.com:


 Giải bài tập SGK & SBT
 Tài liệu giáo viên
 Sách
Sách
 Khóa học
 Thi online
 Hỏi đáp

